Highlight
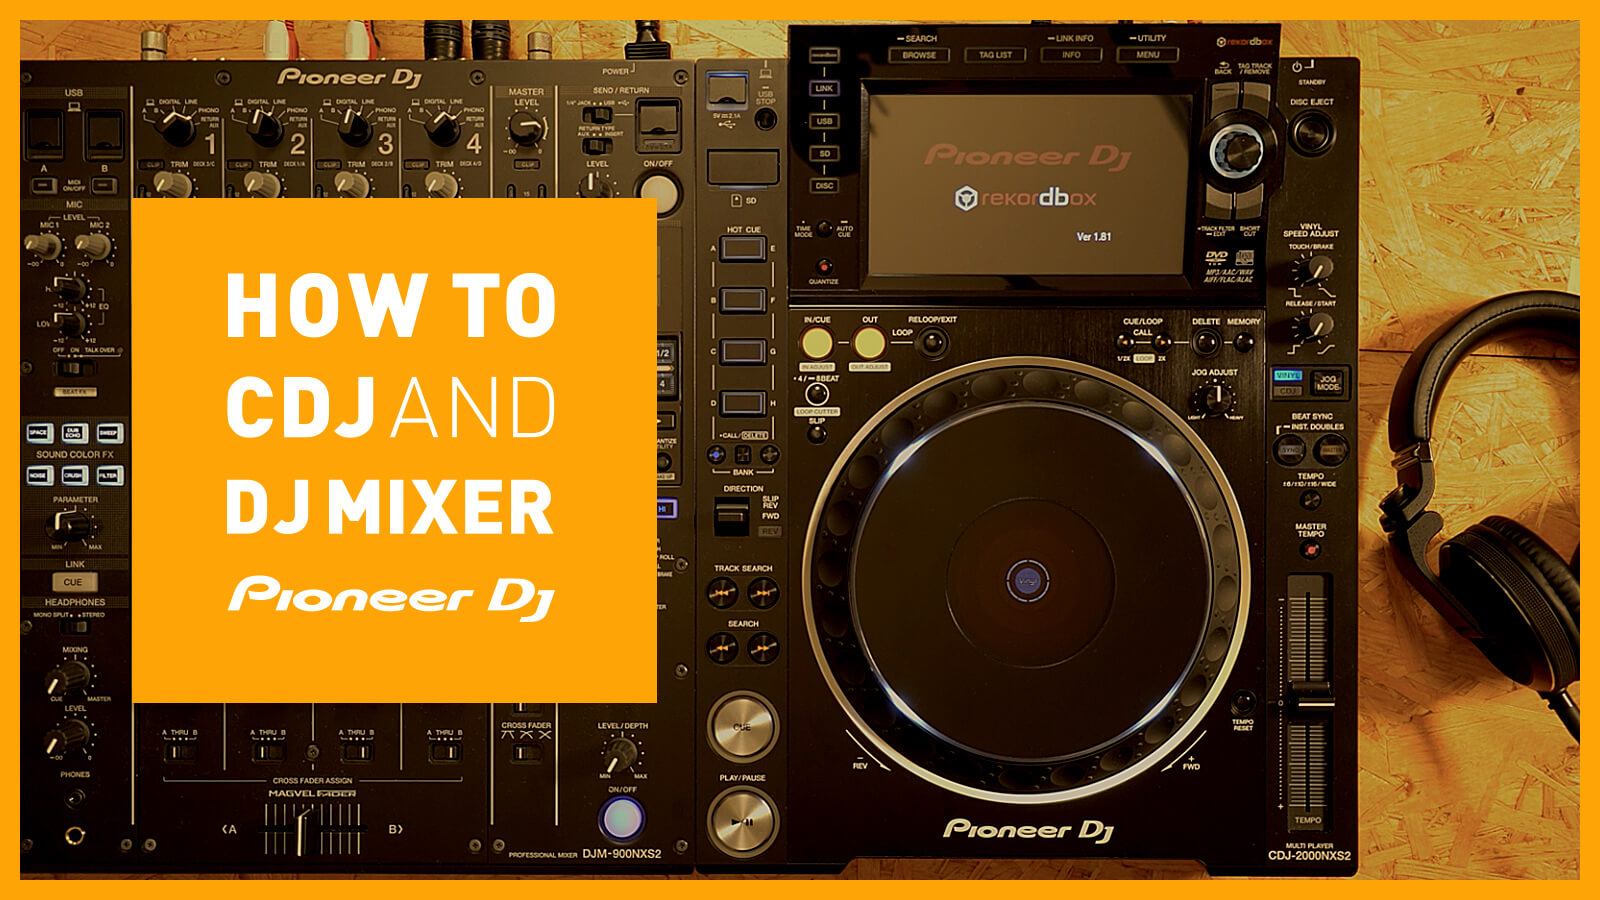
HOW TO CDJ AND DJ MIXER -en-
Text : Hiromi MatsubaraVideo : Shotaro Miyajima
2018.9.18
Learning the basics
Dance music and the art of DJing is more popular now than it’s ever been. But we often hear people say, “DJing looks fun, but I don’t know how to get started.” It’s no surprise – we watch DJs having a great time behind the decks but we can’t see what their hands are doing. So, how did they learn to DJ?
Many professional DJs – including those with legendary status around the world – learned and honed their skills by watching and listening to other DJs, by practising and probably by making countless mistakes. These days, it’s much easier for people to start DJing because of all the new opportunities available such as DJ clubs in schools, where you can learn from others. But to get to the top, it’s important to heighten your understanding of DJing by carefully watching and listening to DJs perform. It’s an obscure art form and there are many ‘star’ DJs with only basic skills. Their rough sets prove it.
Luckily, perfecting the art of DJing is a fun process. To help, we’ve created a tutorial series for people who don’t know how to start, or don’t know what all the buttons do on club-standard equipment. The first 16 parts cover the basics of how to operate the equipment and perform. Once you’ve watched these videos, you’ll be able to spot the techniques used by DJs when you’re watching them mix, for example on Boiler Room, and learn more about what they’re actually doing.
Advanced Features Explained – How to elevate your performances
If you don’t often get to play on CDJs and DJ mixers, you might tend to avoid using features and controls other than the ones you need for basic mixing. Parts 17 – 33 of this tutorial series build on the basics covered in the first 16 parts, explaining some of the more advanced features and the ways you can use them. This might help solve a few mysteries in terms of what certain buttons do and possibly encourage you to experiment with features you haven’t used before. You may find you can improve your sets by playing in a more organised way, using advanced performance techniques and creating unique sounds.
Although we demonstrate some functions found only on Pioneer DJ's latest units – the CDJ-2000NXS2 and DJM-900NXS2 – several of the CDJ features we mention, such as Slip and Sync, also appear on the CDJ-2000NXS and DJM-900NXS. We’ll also show you how to add FX to your tracks using the controls on the DJ mixer.
PART 01
Checking the Connection and Powering Up the CDJ and DJ Mixer
Before you start playing, it’s important to check the CDJ is connected correctly to the DJ mixer, and which channel it’s connected to. While you’re doing this, set the EQ knob to the 12 o’clock position to help the following steps go smoothly. If the decks are already set up at a venue, the sound technician will often tell you which channels to use but it’s still important to check the back of the mixer yourself.
PART 02
Connecting media devices to the CDJ
The CDJ enables you to play music that’s saved on different types of storage devices. Recently, USB flash drives have become the most commonly used. If you use a USB cable you can connect portable hard drives storing large amounts of music files. When you remove a flash drive, be sure to follow the ejection process demonstrated in the video to avoid the risk of damaging your data. SD cards, which often have the same data capacity as USB flash drives, are supported by some CDJ models and there’s less risk of them being accidentally knocked out of place as they’re inserted all the way into the CDJ. If you play with audio CDs, you don’t need to export your music from your laptop to a USB drive or SD card.
PART 03
Selecting a Track
Select a track you want to play by turning the rotary selector and pushing to confirm. Once you’ve selected a track, a waveform appears on the display showing the track is loaded. You can find other tracks on your media device by hitting the BACK button while playing a track. You can also use Pro DJ Link if 2 CDJs are connected with a LAN cable. Push LINK to select a song on the media device connected to the other deck, then play it. You only need 1 media device to play with 2 CDJs.
PART 04
Setting Up the Display
You can display the track list by pressing BROWSE while playing a track. If you press INFO you can view the information of the track that’s playing or the loaded tracks in the file. You can make the waveform smaller or bigger by turning the rotary selector. TIME MODE enables you to change between 2 different timer modes of counting down or up.
PART 05
Playing, Fast-Forwarding and Skipping Tracks
Once you’ve selected and loaded a track, you can play or stop it by pushing PLAY. Press TRACK SEARCH if you want to skip to the next, or previous, track. If you press the button while playing a track, it will start again from the beginning. You can fast-forward or rewind a track by pressing SEARCH. If you flip down the DIRECTION switch, the music will play in reverse. You can reverse playback in time with the beat to vary the pace of the track.
PART 06
Using the Jog Wheel
You can scratch tracks by moving the jog wheel back and forth. The track moves forward when you spin the jog clockwise and backwards when you spin it anticlockwise. The track pauses if you hold the jog wheel still. This is only possible when the JOG MODE is set to VINYL MODE. Scratching is disabled when the jog is set to CDJ MODE. You can also speed up or slow down the track that’s playing by turning the outer part of the jog wheel, which can be helpful when mixing tracks together. The load gets heavier if you turn the JOG ADJUST to your right, and lighter if you turn it to your left. If you press TRACK SEARCH or SEARCH while spinning the jog wheel, you can fast forward, rewind, or skip tracks smoothly.
PART 07
Using the Cue
Set the CUE point by pushing CUE while a track is paused. You can use the jog wheel to find the point you want to use, then hit CUE. If you hit CUE while a track is playing, it pauses and jumps to the CUE point. The track will keep playing while you hold the CUE button so you can hear as much as you need to and it will jump back to the CUE point if you let go of the button. If you hit PLAY while holding CUE, the track will keep playing after you release the CUE button.
PART 08
Using the Tempo Slider
Use the tempo slider to change the speed (BPM) of a track. As you slide the fader up, the value of the displayed BPM decreases and the music slows down. As you slide the fader down, the value of the displayed BPM increases and the music speeds up. By pressing TEMPO you can switch through the different tempo ranges of ±6, ±10, ±16, and WIDE. If you press MASTER TEMPO the red light shows and now, even when you change the tempo, the track will play in its original key. If you hit TEMPO RESET the green light shows and the original tempo of the track will be locked, regardless of the position of the tempo slider.
PART 09
Using Beat Loop
A section of the track will loop from the point where you press IN/CUE to the point where you press OUT while the track is playing. If you press RELOOP/EXIT the loop will be cancelled and you can return to the loop if you hit the button twice. You can choose a 4 beat loop by hitting 4/8 BEAT and switch to an 8 beat loop by holding the button longer (this function appears on selected CDJ models only). On the CDJ-2000NXS2 we’re using in the video, the range of the beat loop appears on the display, enabling adjustment of the loop length.
PART 10
Making Initial Settings on the DJ Mixer
As suggested in Part 1, turn the EQ knobs on the DJ mixer to 12 o'clock before playing any sounds. If the level meter lights up when you play a track on the CDJ, it means the DJ mixer is picking up the audio. Adjust the channel volume with the TRIM knob – the ideal volume level is when the meter lights up orange. Avoid a red level as it may cause sound distortion. Now raise the fader next to the channel and check if the MASTER level meter lights up. Adjust the output level by turning the LEVEL knob on the MASTER channel until it lights up orange.
PART 11
Using the Channel Faders, Crossfader and EQs
During your DJ set, you’ll use the channel faders and crossfader for mixing. The audio output is sent out when a channel fader is raised and the volume varies depending on the position of the fader. By sliding up multiple channel faders you can mix various tracks and sounds. Use the EQ knobs to adjust the frequency of the sound on each channel. Generally, you should position the crossfader in the centre when mixing audio with the channel faders. You can set the crossfader to the left or right and lock the position with the CROSS FADER ASSIGN found under channel faders.
PART 12
Using the Headphone Knob and Headphone Cues
During your DJ set, through your headphones you’ll be able to listen to the loaded track, current track, and the sound playing out of the monitor. When the MIXING knob is pointed towards CUE, you can listen to the tracks on channels 1 to 4 with flashing CUE buttons. If you point the knob towards MASTER, and the CUE button on the MASTER channel is flashing, you can listen to the sound that’s coming out of the monitor. If you turn the MIXING knob to the centre, where it says MIXING, you can listen to the tracks on channels 1 to 4 with flashing CUE buttons and the sound that’s coming out of the monitor at the same time. Adjust the headphone volume with the LEVEL knob.
PART 13
Using Sound Color FX: Part 1
You can add an effect to a track that’s playing by using SOUND COLOR FX. Choose one of the 6 effects and hit the button. If the button flashes, it means the effect is applied. The effect will be applied to the channel you choose when you turn the COLOR knob and the level of the effect is adjusted depending on how much you turn the knob. You can also change the level of the effect by adjusting the parameter control with the PARAMETER knob. In the Part 1 video we’ll introduce the SWEEP, DUB ECHO and SPACE effects. Please note that you can’t use multiple types of SOUND COLOR FX at the same time.
PART 14
Using Sound Color FX: Part 2
You can add an effect to a track that’s playing by using SOUND COLOR FX. Choose one of the 6 effects and hit the button. If the button flashes, it means the effect is applied. The effect will be applied to the channel you choose when you turn the COLOR knob and the level of the effect is adjusted depending on how much you turn the knob. You can also change the level of the effect by adjusting the parameter control with the PARAMETER knob. In the Part 2 video we’ll introduce the FILTER, CRUSH and NOISE effects. Please note that you can’t use multiple types of SOUND COLOR FX at the same time.
PART 15
Using Beat FX and Recommended Effects
BEAT FX adds an effect to the track that’s playing in time with the beat. Use the effect channel selector switch to apply the effect to any one of channels 1 to 4, MASTER, the left or right side of the crossfader, or MIC. Choose the effect with the beat effect selector switch. Once you hit and light up the ON/OFF button of the BEAT FX, you can adjust the level/depth with the LEVEL/DEPTH knob. If you turn the TIME control above, you can adjust the effect time parameter. In this video, we’ll show you 6 different techniques that might be handy in your DJ sets.
PART 16
Using Hot Cues
HOT CUES enable you to instantly call up and play a maximum of 8 different cues per track that you set with the HOT CUE buttons. Set the in-point the same way you set the CUE point (shown in Part 7), and set the HOT CUE by pressing 1 of the buttons from A to D. The HOT CUE light will turn green or orange and an alphabet will appear above the waveform on the screen. Press BANK to switch between HOT CUES A to D and E to H. To delete the HOT CUE, hit the HOT CUE button flashing in green or orange while holding the CALL/DELETE button.
PART 17
Using Vinyl Speed Adjust and Slip
If you turn on SLIP, the track will play silently in the background, maintaining its beat, even if you pause or scratch the track with the jog wheel when the JOG MODE is set to VINYL. While SLIP mode is on, the current playing point will be shown by the yellow line and the current background point by the white line on the display. If you turn off SLIP, the track will resume from the point in the track where you turned it off. You can create unique grooves by using SLIP and adjusting the pausing speed with the VINYL SPEED ADJUST TOUCH/BRAKE knob and the resuming speed with the VINYL SPEED ADJUST RELEASE/START knob.
PART 18
Using Advanced Slip Techniques
When SLIP is on, the track will play silently in the background with its original beat even if you loop the track and use a HOT CUE or REVERSE mode, so you can trigger features without losing the groove. You can also use the loop beats of 1/3 and 3/4 only when SLIP is on. Practise this technique and you’ll be able to spice up your sets with it.
PART 19
Using Beat Jump
You can fast-forward or rewind the track precisely and smoothly with BEAT JUMP. If you hit 1 Beat on the display, you can skip forwards or backwards by 1 beat. If you tap BEAT JUMP on the right side of the display, 4 different beat values appear – 2, 4, 8, and 16 –enabling you to skip forwards or backwards by that many beats.
PART 20
Using Short Cut / Search
The SHORT CUT button enables you to quickly access the 4 display categories; TRACK, PLAYLIST, SEARCH and MATCHING. You can press SHORT CUT instead of pressing the BACK button to return to the initial display categories. SEARCH enables you to search for tracks by typing in keywords. The SHORT CUT button also enables you to change the format and colour of the waveform and phase meter, turn on and off the automation of the assigned HOT CUE, and change the settings of the CDJ.
PART 21
Using Track Filter (*Data must be synced to rekordbox)
Press the TRACK FILTER button to filter tracks by BPM, KEY, etc. based on their previous rekordbox analysis, and by data you’ve set in rekordbox: RATING, COLOR, and TAGS. This is useful when you want to call up your favourite tracks stored in the TAG LIST, or the ones that have a similar BPM or the same KEY, etc. as the track you’re playing. If you hold the TRACK FILTER button, the filtering options appear on screen where you can change the filter criteria for BPM, KEY etc. The criteria settings will be saved in your media file (on USB or SD card), and you can set the criteria in rekordbox before playing.
PART 22
Setting Memory Cues and Beat Count
Once you set the CUE point, you can save it as a MEMORY CUE by pressing the MEMORY button. The MEMORY CUE is set when an inverted red triangle appears above the waveform. If you hit the DELETE button on the MEMORY CUE point, the inverted red triangle disappears. You can set up to 10 MEMORY CUES (you can set the same amount in rekordbox), and you can call up the newest one by pushing CALL. While you’re playing a track, the bar countdown to the next MEMORY CUE point appears on the display. Touch the waveform on the display to show the bar countdown to the point you’re touching, indicated with the green line.
PART 23
Using the Tag List
If there’s a track you want to play next or if you suddenly find a track you want to play later that suits the vibe on the dancefloor, you can tag a red mark to it with the TAG TRACK/REMOVE button. This adds the track to the TAG LIST. You can list up to 100 tracks in a media file. If you want to remove the track(s) from the TAG LIST, select the track and click TAG TRACK/REMOVE to take away the red check. Putting tracks in the TAG LIST helps you find them faster.
PART 24
Using Sync: Part 1
The BPM and beat position of the track can quickly be synced with a track on another CDJ when you use SYNC. First, push the BEAT SYNC MASTER button so it lights up orange on the ‘main’ CDJ that’s playing the track. The BPM indicator at the bottom right of the display will also turn orange. Next, push SYNC on the other deck to sync that track with the BPM and beat position of the track played on the ‘main’ deck. The tempo slider on the synced CDJ is now disabled but the BPM from where the tempo slider is set will still be displayed in grey. If you press the SYNC button again to cancel syncing, the BPM will stay the same but you’ll be able to change it back to the original tempo by moving the tempo slider to its original position.
PART 25
Using SYNC: Part 2 – Instant Doubles
An INSTANT DOUBLE is when you load the same track that’s playing or loading on the ‘main’ CDJ to the other CDJ and play it from the same CUE point. Follow the same steps you did when setting BEAT SYNC but this time, hold the BEAT SYNC button on the second deck for over a second. The track from the ‘main’ deck will now be playing at the same tempo and in exactly the same place on the second deck. In the video, we move the track one beat by hitting the 1 BEAT JUMP button on one of the decks. This is a popular trick used by DJs in advanced scratching techniques.
PART 26
Adjusting Parameters on Sound Color FX
You can adjust the intensity of SOUND COLOR FX by turning the PARAMETER knob. This is particularly effective when you’re using the DUB ECHO or CRUSH effect. You can also create a sound similar to scratching by turning the PARAMETER knob while turning up the NOISE on an empty channel.
PART 27
Using FX Frequency
Using FX FREQUENCY, you can choose to apply BEAT FX to any combination of the frequency ranges HI, MID and LOW. Each frequency range button lights up when the BEAT FX is applied, and the light turns off when it’s not. For example, if you turn off LOW, you can keep the groove of the track with strong kicks while the BEAT FX changes the sound of the MID and HI. If you turn off HI and MID, the melody will be maintained with smaller kicks and a softer sound.
PART 28
Using the EQ Curve
Q CURVE enables you to control channel frequencies with two settings; ISOLATOR and EQ. You can adjust the frequency ranges on each channel from -26dB to +6dB using EQ. ISOLATOR enables you to completely remove each frequency.
PART 29
Using the X-PAD
You turn the parameter of the BEAT FX on and off by hitting the X-PAD. You can also control the parameter time and value by touching the X-PAD in different places and by moving your finger while it’s pressed down. If you change the effect with the BEAT FX mode switch, the display on the X-PAD will change, enabling you to find the parameter time and value easily. If you want to keep the BEAT FX going when you take your finger off the X-PAD, push the BEAT FX ON/OFF button while your finger is still touching the X-PAD, then lift your finger and the effect will be maintained.
PART 30
Connecting to USB Send/Return
You can connect FX units or mobile devices with USB adapters (such as an iPhone) to mixers that have a USB SEND / RETURN socket. Set the USB SEND / RETURN switch to 1/4" JACK when you’re connecting an FX unit, and set it to USB when connecting a mobile device. In the video, we’re connecting the Pioneer DJ iPhone recording app, DJM-Rec. DJM-Rec enables you to record your mixes by pressing the red button to start and stop recording, and you can edit the volume and frequency of the recorded sound. It’s a convenient way to record your sets as there’s no need to transfer files to your laptop.
PART 31
Using the Time Knob
Turn the TIME knob to adjust the time parameter of BEAT FX. The TIME knob enables you to make precise time-based adjustments to the effect when using DELAY, REVERB and SPIRAL (as shown in the video).
PART 32
Combining Beat FX and Sound Color FX
Part 1: “ECHO+FILTER”
You can use BEAT FX and SOUND COLOR FX at the same time. When you’re using both effects, find the perfect balance by adjusting the parameter values of each effect and the time parameter with the BEAT FX TIME knob. You can enhance your sets by finding the perfect effect. In the video, we use ECHO and FILTER – a perfect combination of effects to use during the break in a track.
PART 33
Combining Beat FX and Sound Color FX
Part 2: “NOISE + TRANCE”
You can use BEAT FX and SOUND COLOR FX at the same time. When you’re using both effects, find the perfect balance by adjusting the parameter values of each effect and the time parameter with the BEAT FX TIME knob. You can enhance your sets by finding the perfect effect. In the video, we combine NOISE and TRANCE. You can create a sound similar to scratching by adding the SOUND COLOR FX NOISE to an empty channel and using the BEAT FX TRANCE on the X-PAD.


